User interface#
CityDoctor#
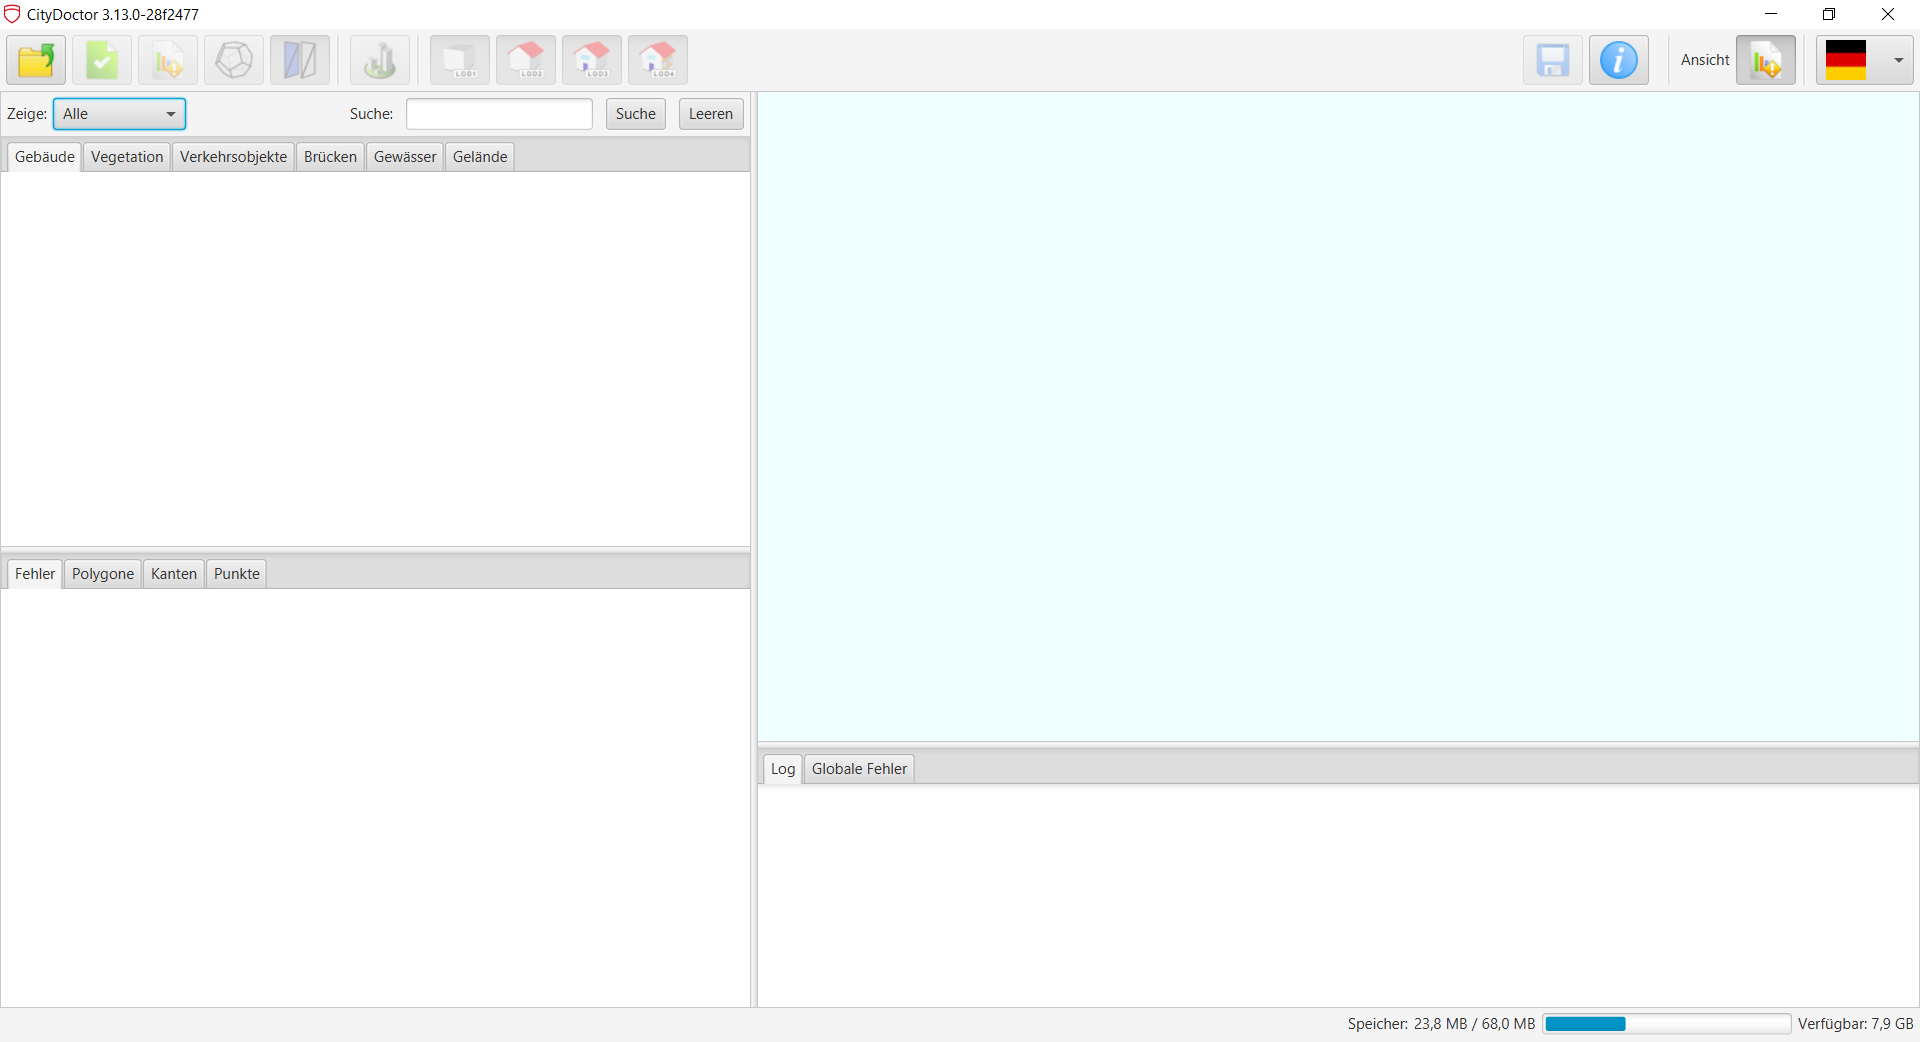
In the upper bar the following buttons are in order:
- Load: Opens the dialog for loading a CityGML file
- Validation: Opens the dialog to check a loaded CityGML
- Validation results: Opens the dialog for writing a test protocol in xml or pdf form
- Grid: Shows/hides the grid instead of filled polygons
- Backsides: Shows/hides backs of polygons
- Global View: Loads all elements of a CityGML into the view
- LODs: Turns individual LODs on or off from the view
- Save: Saves a CityGML file back, if the file was checked the QualityADE is written too.
- About: Opens the dialog with information about the project CityDoctor2
- View: Switches different views. There is only one for the validation part.
- Language: Here you can set the language (German/English)
Warning
Displaying the Global View can cause crashes with large CityGML files (> 100mb depending on the system). The display may take a short time.
Load#
The Load button opens the dialog for loading a CityGML file.
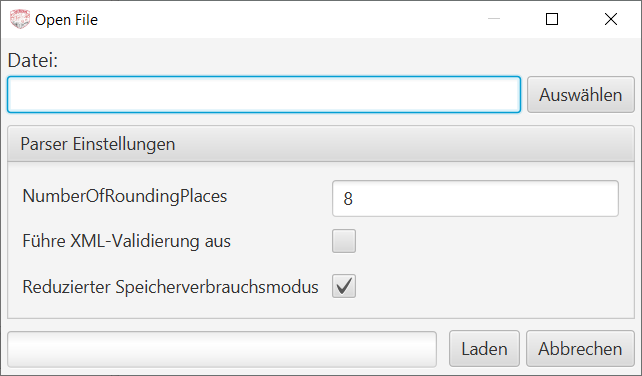
In the file bar a file path can be entered or selected via the Select button.
In addition, other settings for reading the file can be specified.
- NumberOfRoundingPlaces: To how many decimal places are the read-in values rounded?
- XML-Validierung: Performs an XML validation. Errors are detected directly during the import and the import is aborted.
- Low Memory Consumption Mode : Saves RAM to allow larger files in the GUI. Slight performance costs during the validation process.
When loading, the progress is approximately represented by the loading bar.
Note
Files can also be dragged and dropped directly from the file manager into the GUI without using the load dialog. The default values are assumed (8 decimal places, no XML validation).
After loading a CityGML file, the elements are displayed in the individual tabs. Selecting an element will display it in the view.
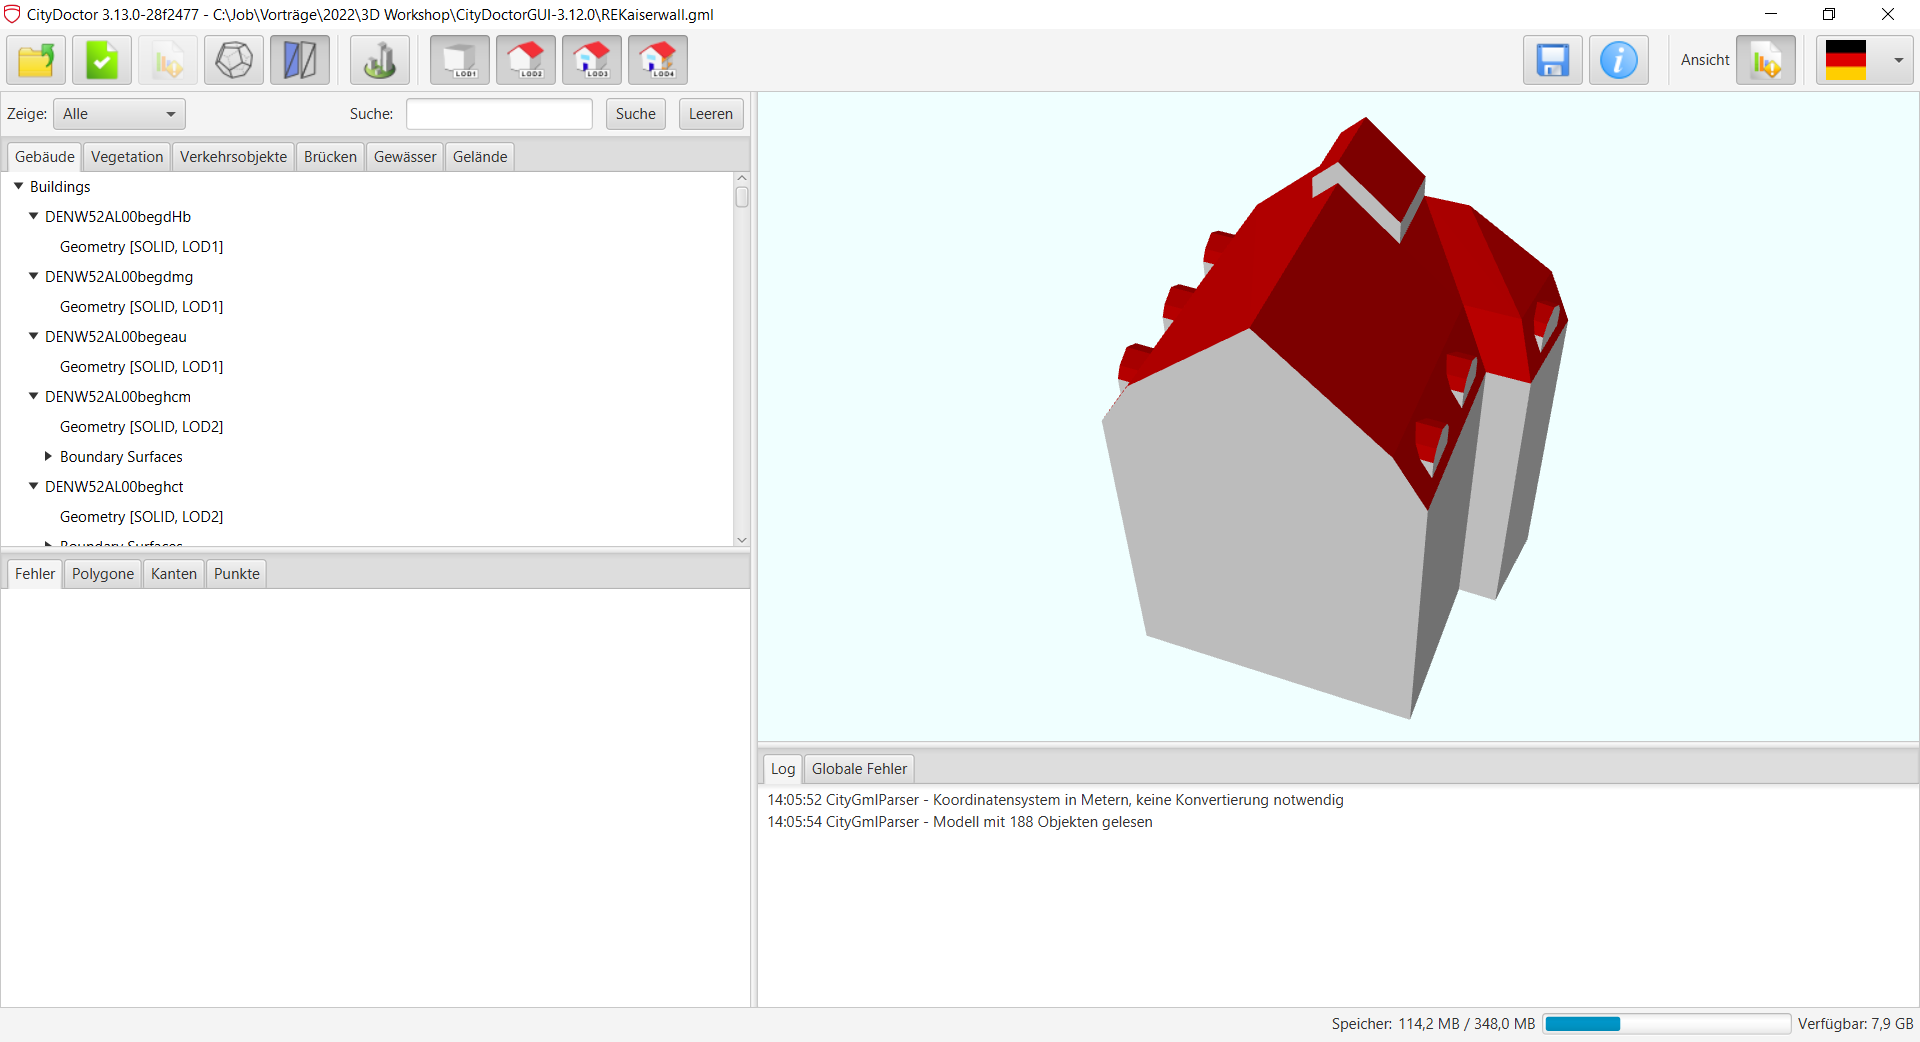
Note
By selecting the top element of a tab, all elements within this tab are displayed. As the above warning states, larger amounts of data will cause crashes.
Validation#
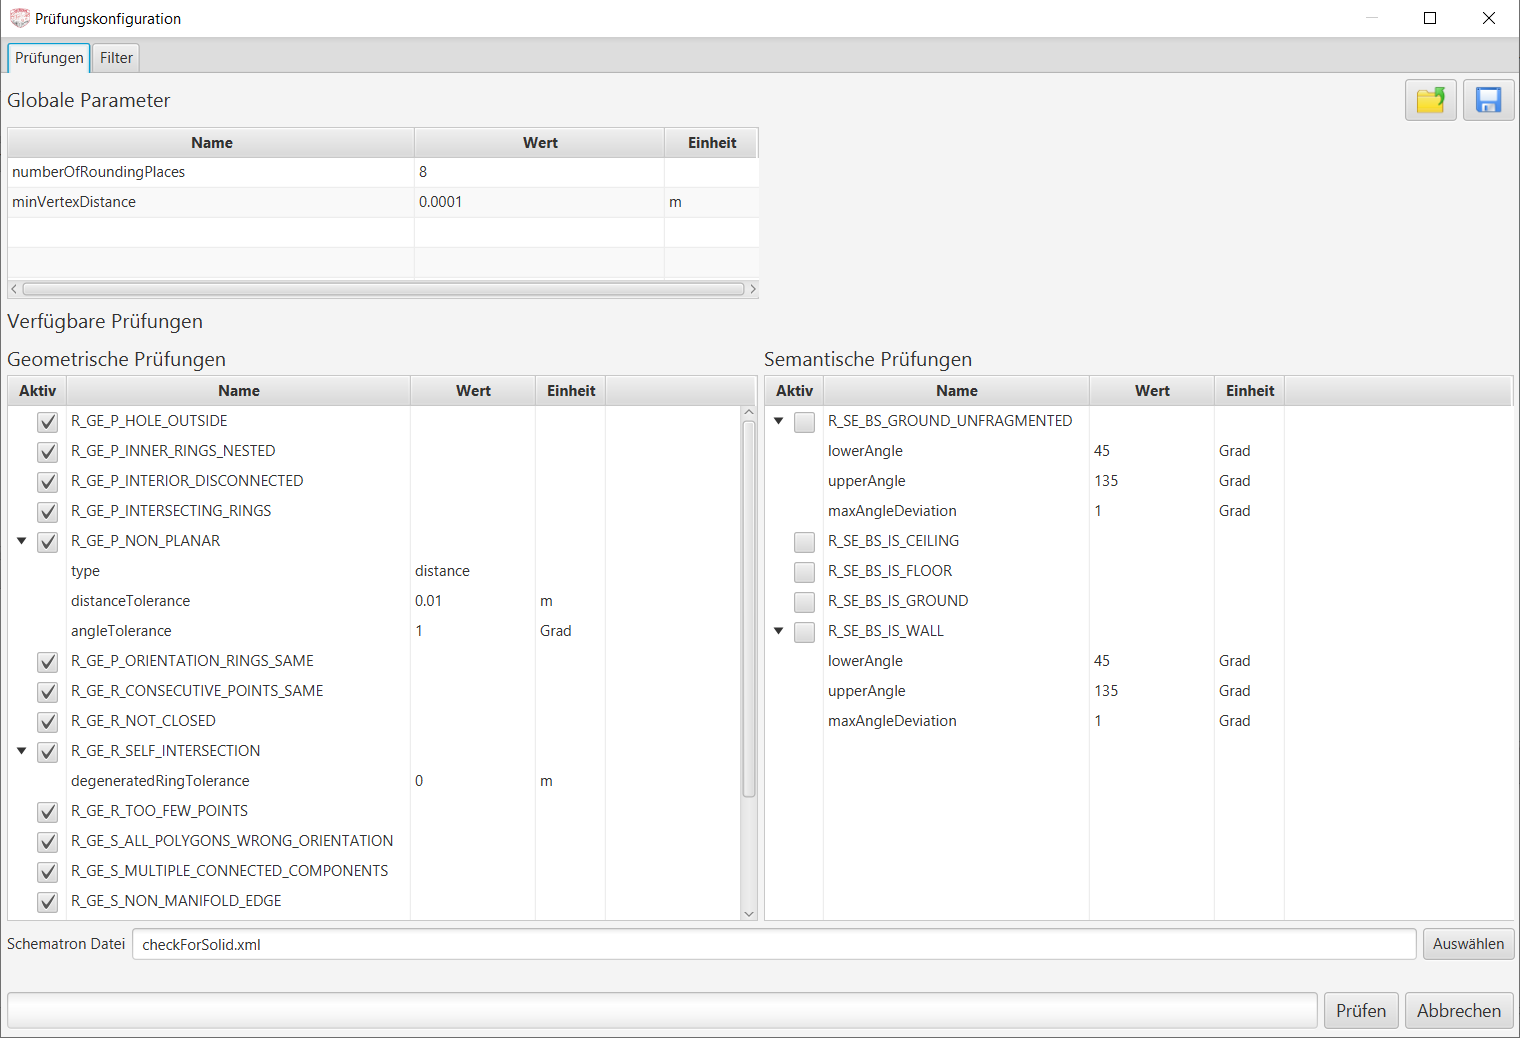
The validation plan can be customized in the check dialog. In addition to the available checks, the global parameters are also displayed here.
The parameters can be changed with a double click in the value column. The unit is fixed.
Note
The numberOfRoundingPlaces parameter cannot be changed. It was set when the file was loaded.
If checks should not be executed, they can be deactivated in the Active column.
Warning
If checks are disabled but other active checks need them as dependencies, they will be re-enabled during the check to ensure stability. See Requirements.
In the Schematron file field, a path to a Schematron file can be entered. In this file flexible rules for the semantic requirements can be defined. See Semantic Requirements
The test plan can be saved and loaded via the two buttons at the top right.
After the check, elements with errors are colored red and elements without errors are colored green. When selecting an element that contains errors, the errors are displayed in the lower tab Errors. There you can select the error to display it in CityDoctor and get more information.
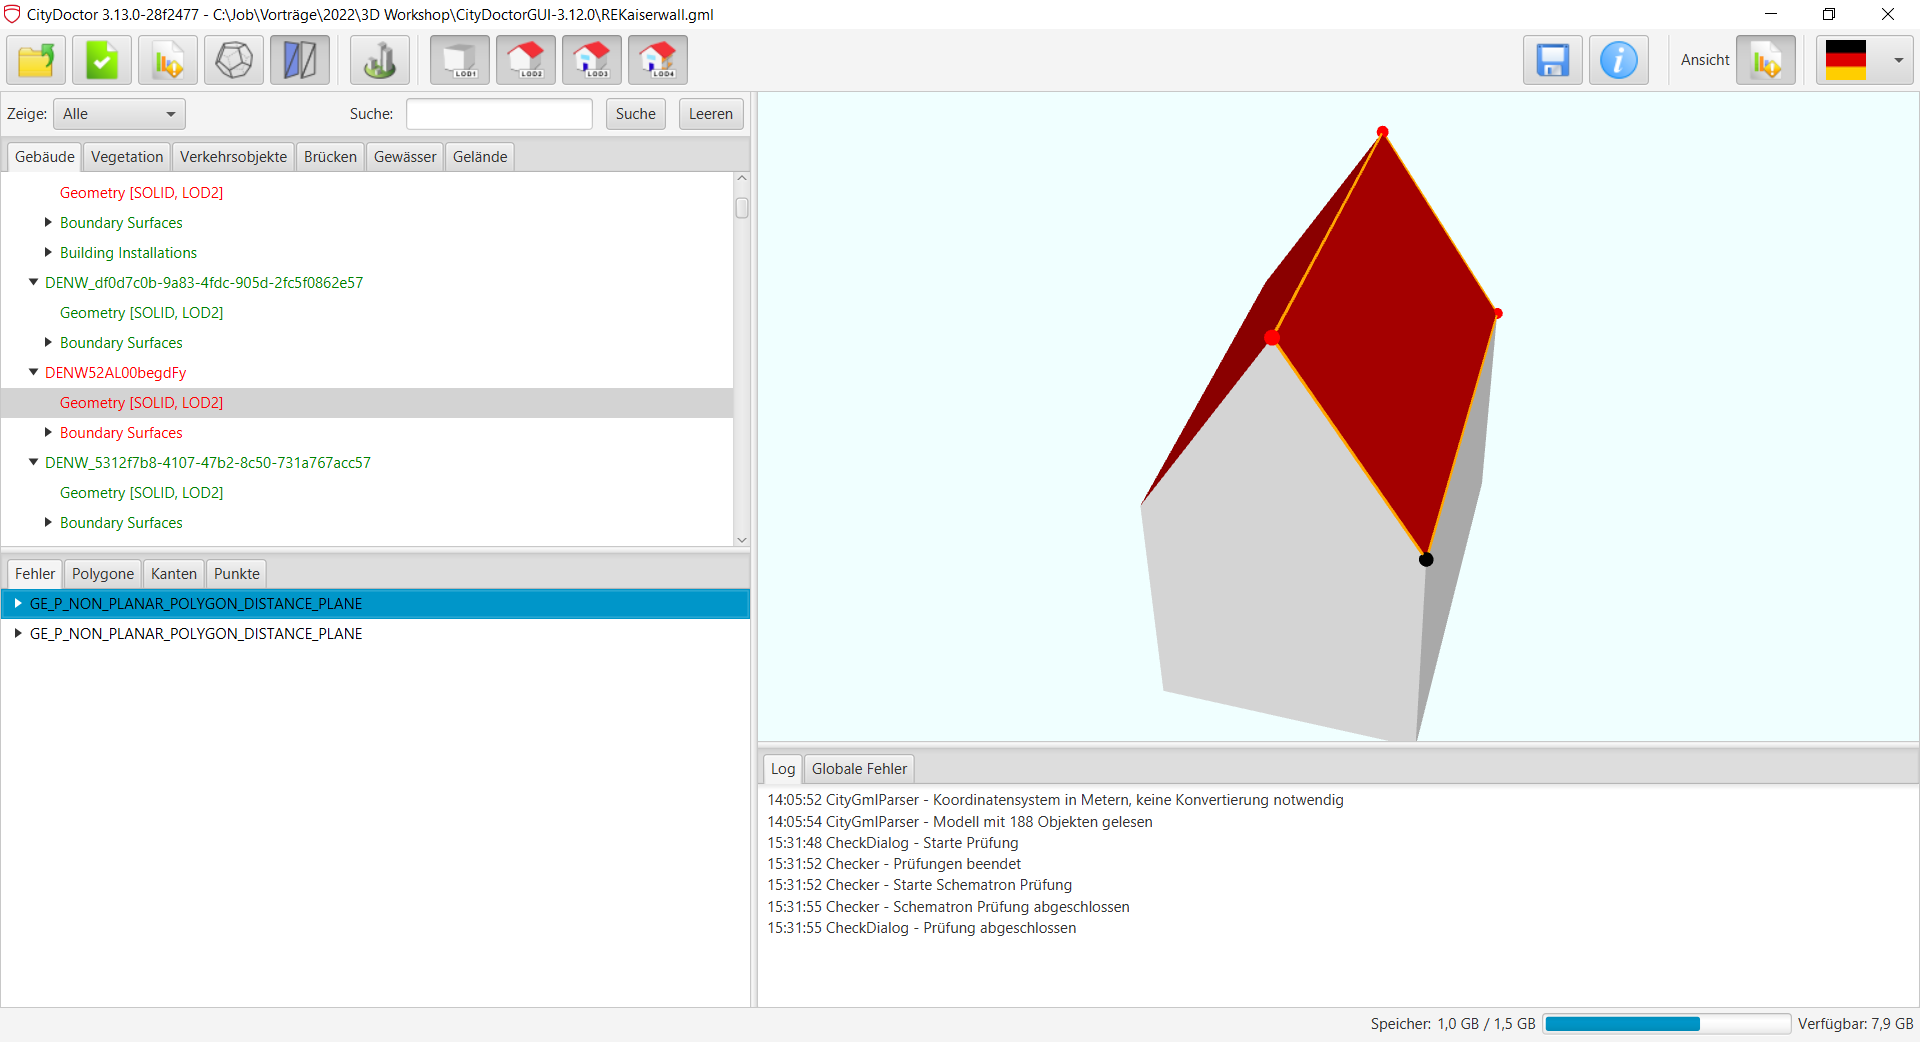
The elements can be filtered with the dropdown menu to show only faulty elements.
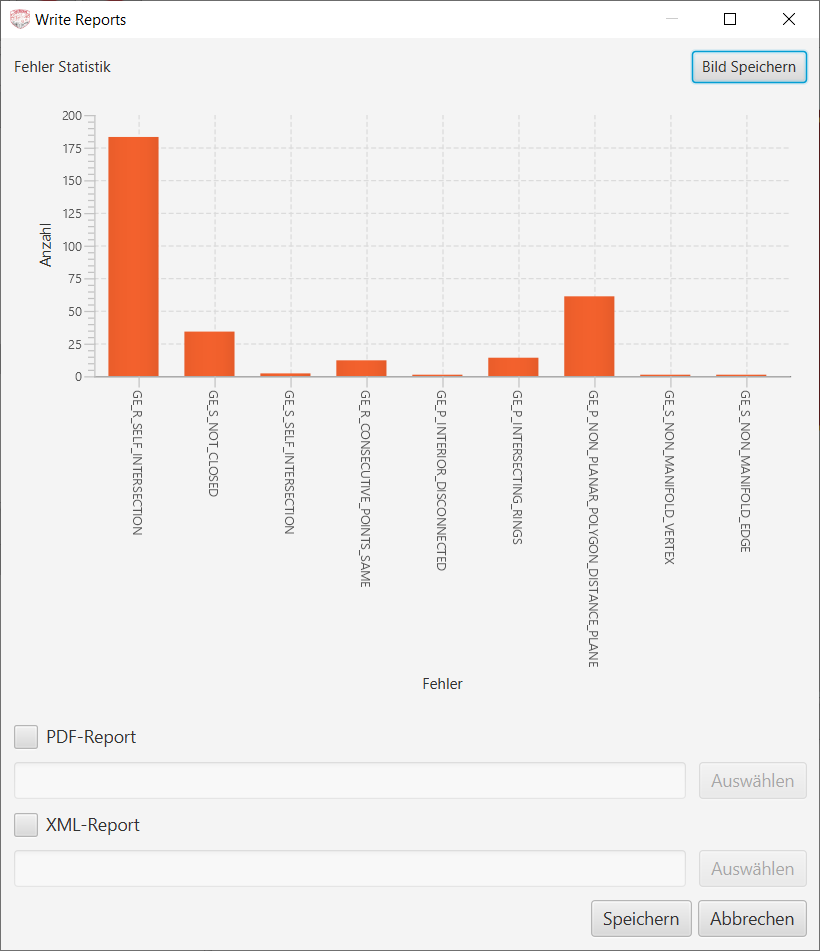
Validation reports#
In this dialog there is again an overview of the errors in image form and the possibility to write an xml or pdf report.